If you’re an adventurer in Baldur’s Gate 3 searching for exceptional weapons and armor, the Adamantine Forge is the holy grail. But it’s not as simple as strolling up and forging your dream gear—this is a place guarded by a powerful titan, Grym the Guardian. The journey to access the forge is as treacherous as it is rewarding. In this guide, I’ll walk you through how to reach the Adamantine Forge and take down Grym, all while revealing the secrets to forging some of the most coveted equipment in the game.
Amazon co-founder MacKenzie Scott has donated over $19 billion to charity in just five years
Diamond batteries powered by nuclear waste promise 28,000 years of clean energy
Why Head to the Adamantine Forge?
The Adamantine Forge in Baldur’s Gate 3 is not just a cool location; it’s a crucial part of your journey if you’re looking to forge weapons and armor made of adamantium—some of the most powerful materials in the game. The items crafted here come with incredible bonuses, making them invaluable as you progress through your adventure.
For example, I forged a set of adamantine scale armor that came with these impressive bonuses:
- Magic Hauberk: Reduces all damage taken by 1 point.
- Adamantine Recoil: When you’re hit by a melee attack, the attacker stumbles for 2 turns.
- Immunity to Critical Hits: Attackers can’t land critical hits on the wearer.
However, getting these powerful items isn’t a walk in the park. The journey to reach the forge is fraught with obstacles, and you’ll need to carefully navigate these challenges if you want to emerge victorious.
How to Get to the Adamantine Forge in Baldur’s Gate 3
To access the Adamantine Forge, you’ll need to make your way to Malforge, a location under the control of the Deep Gnomes and Nere, a follower of the Absolute. But before you can get there, you’ll have to first find your way into the Underdark, a vast and dangerous network of caverns below the surface.
Entering the Underdark
The entrance to the Underdark can be found near the Goblin Camp. From the ruined sanctuary hall, where you’ll find the Goblin Priestess, head left and unlock the first door you come across. Beware of the nearby goblins—they won’t take kindly to you tampering with their locks. To avoid detection, you can separate a party member and crouch while unlocking the door to remain hidden.
Once you’re inside, you’ll need to unlock another door leading to the Desecrated Temple, where things will get a lot more complicated. Polma, the temple guardian, stands in your way. To proceed, you’ll either have to persuade or intimidate her (with a roll of 20-22 on a skill check), which isn’t an easy task. Alternatively, you can use the environment to your advantage, hiding from her line of sight while making your way through the temple.
Next, you’ll be faced with a puzzle—simply adjust the stone discs to create four black points at the bottom and four white points at the top. Once you’ve solved it, the path to the Underdark will open up.
NASA warns China could slow Earth’s rotation with one simple move
This dog endured 27 hours of labor and gave birth to a record-breaking number of puppies
Reaching Malforge
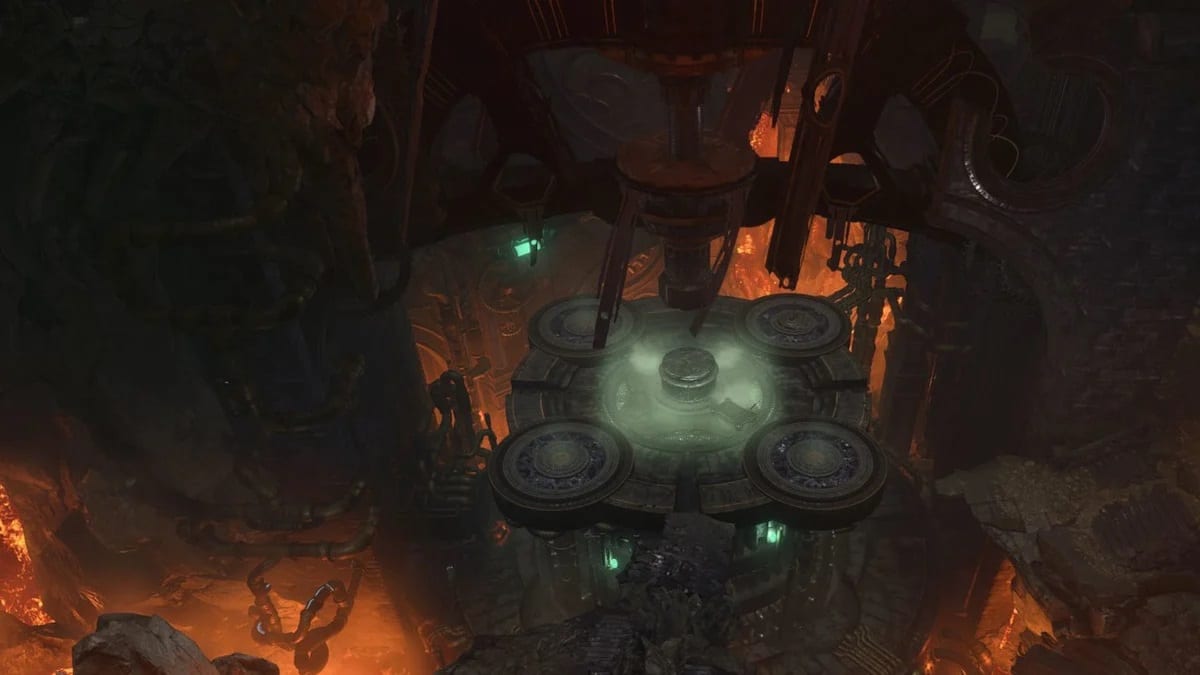
Once you’re in the Underdark, make your way to the Decaying Village, located in the western section. From there, head south to find a large square with a lava-filled area. The forge is hidden behind this lava zone, and to reach it, you’ll need to make use of the Githyanki Jump ability, granted by Lae’zel, to leap across the lava and enter a series of inaccessible ruins. Continue climbing until you find a terrace lined with racks of polearms, and descend the stairs on your right to find a teleportation point.
You’ll need to use the teleportation point to bring your entire party to the area, then head up the stairs to find the Adamantine Forge awaiting you.
How to Activate the Adamantine Forge
Once you’ve made it to the forge, the next task is to activate it. To do so, you’ll need to place a mold (found in the abandoned forge refuge) into the machine‘s mold compartment and a piece of mithral (a rare material you can find in the ancient temple) into the mithral crucible. Once both are in place, pull the lever to start the forge process.
The forge will need lava to heat up, and to get this, you’ll need to activate a valve located on the southern platform. Doing so will summon Grym, the Guardian of the Forge, who will be ready to defend it with all his might.
Where to Find a Mold and Mithral
As you explore the abandoned forge refuge before reaching the Adamantine Forge, you’ll find several molds scattered around. One such mold is used to forge adamantine scale armor, which is a great choice for enhancing your defenses.
Mithral, on the other hand, can be found by breaking open a mithral vein in the ancient temple. A sharp object—like a lightning spell—should be enough to shatter it and retrieve the valuable material.
The Boss: Grym, the Guardian
Grym is a formidable opponent, and defeating him will require strategy and patience. Here’s a breakdown of his stats:
- Level: 8
- Health: 300 HP
- Resistances: Grym is highly resistant to most attacks.
- Weakness: Grym becomes vulnerable when overheated.
Although you may be tempted to attack him head-on, Grym is intentionally designed to be a tough boss. Instead, you’ll need to rely on the environment and various mechanisms in the forge to bring him down.
Combat Strategy
- Divide your group: Position one ally on the valve platform (east), another at the lever (south), one near the crucible, and the last on one of the remaining platforms.
- Trigger the lava flow: Activate the lava valve to begin the process and get Grym’s attention. Keep your ranged attacker at the crucible, so Grym targets them.
- Manipulate Grym’s position: Once Grym is near the crucible or overheated, move your ranged character to the platform behind him and pull the lever to unleash the hammer.
- Take out the imps: While Grym is stunned from the hammer blow, use this opportunity to eliminate the imps and focus your efforts on keeping Grym in place.
- Repeat: Continue this cycle—triggering the valve, repositioning your ranged character, and using the hammer—until Grym is defeated. It usually takes two hammer strikes to bring him down.
Once Grym is defeated, you’ll be able to claim the spoils of your victory, including the impressive gear forged from adamantium. You can now enjoy the fruits of your labor as you continue your journey through Baldur’s Gate 3.